Sign up to receive FREE videos each week!
Seconds:
Downloads

MA_Vanishing Point

2013_11_10_Talmo-Texaco-Station-1.jpg

2013_09_23_Newfield-Texaco-Station-NJ.jpg

2012_09-Teapot-Service-Station-Zillah-WA-00052-1.jpg
Join to Download
Already a member?
Log in to download.
52:40 Duration
Vanishing Point
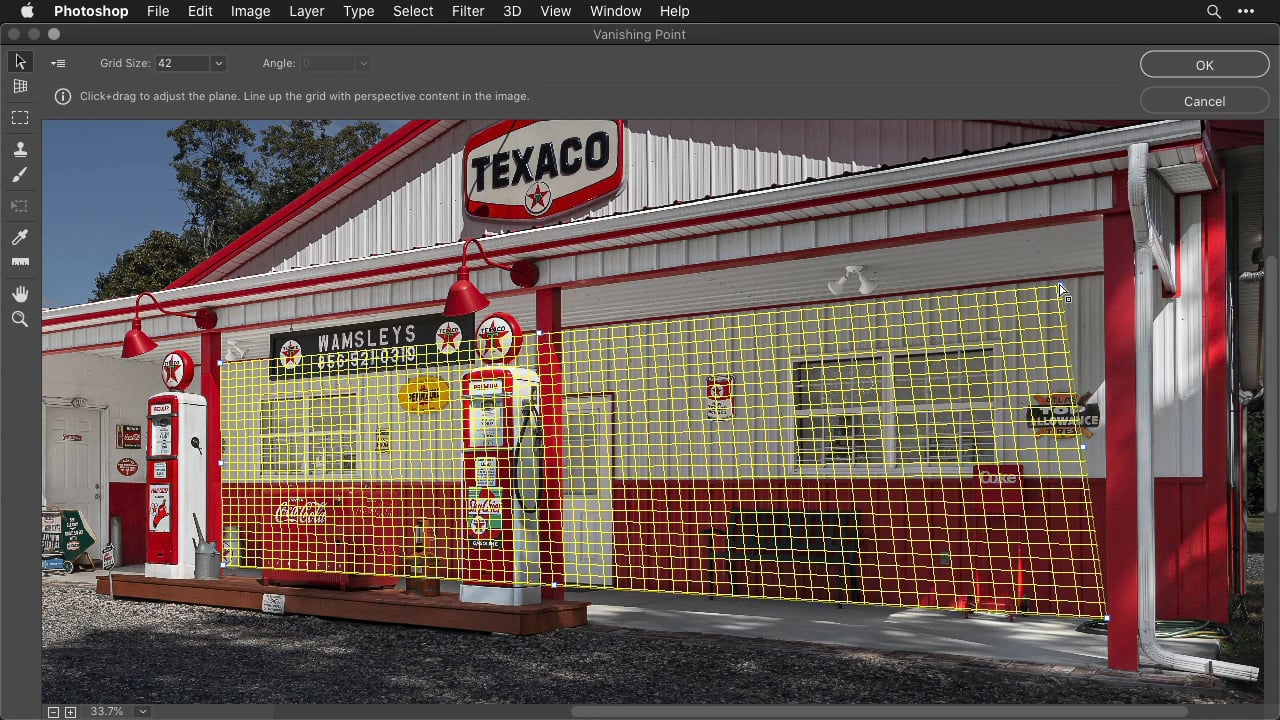
This lesson show you how to educate Photoshop about the three dimensionality of a scene so that it can properly maintain perspective when cloning or moving objects. That is done through the use of a filter called Vanishing Point. I’ll also show you how to create a layer that contains a perspective grid that can be useful when using the Edit>Transform>Distort feature.
Bonus Tip: You can hold Command (Mac), or Ctrl (PC) and drag the middle handle on the edge of a plane to create another plane that is 90° from the plane you are dragging from. I find that feature to be of limited use since it will limit how much control you have over fine-tuning the corners since any change will affect both planes.
Become a Member for Immediate Access to:
Immediate access to over 338 hours of streaming video lessons
A new lesson each week for as long as you’re a member
5,374 pages worth of PDF companion guides
1,014 downloadable practice images, actions and presets
Access to our members-only private Facebook group where you can interact with other members, ask questions and receive constructive feedback on your images.